Apologies for not creating video’s recently, but I have had a serious internet/creator burn out [hard to believe I know, but it’s been difficult to get motivated]. Also, the heat here in the UK has made even practicing difficult as it’s gone up to 37/38 degrees at times.
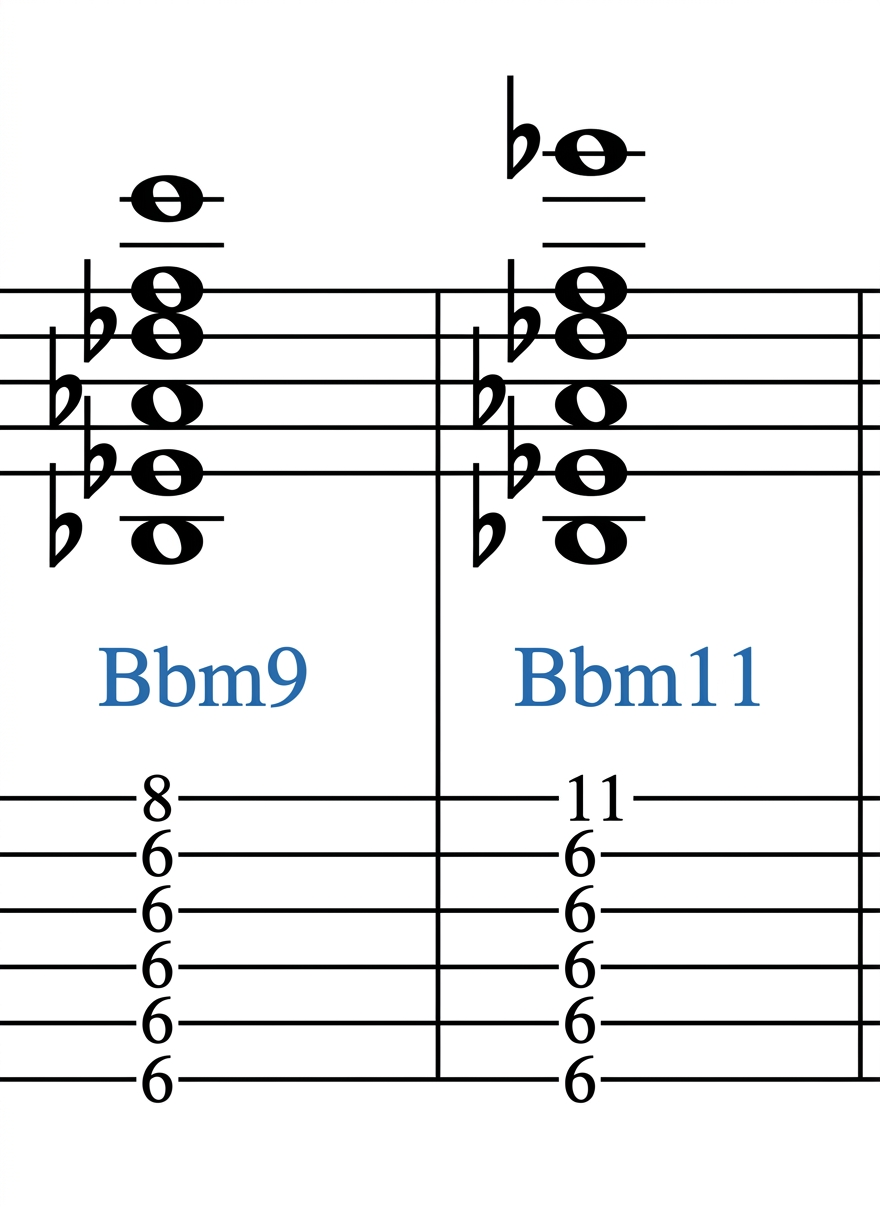
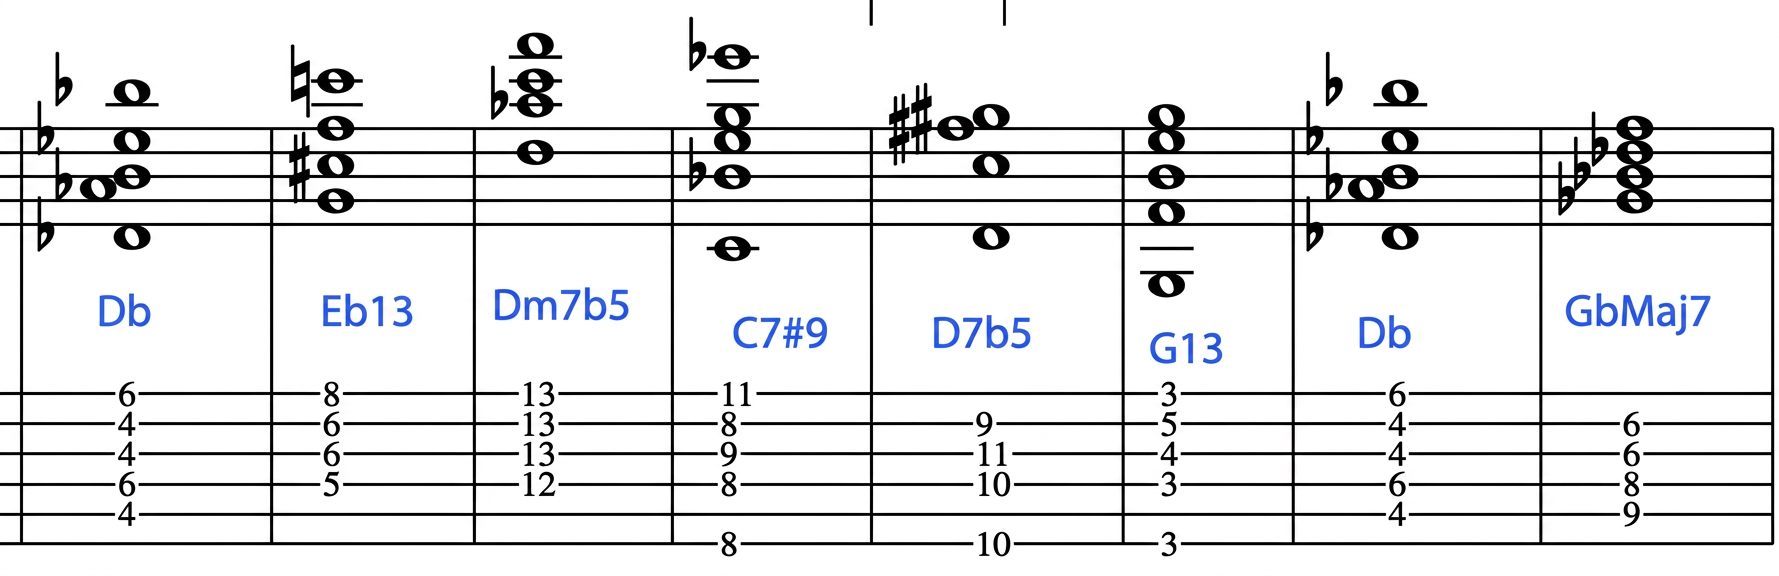
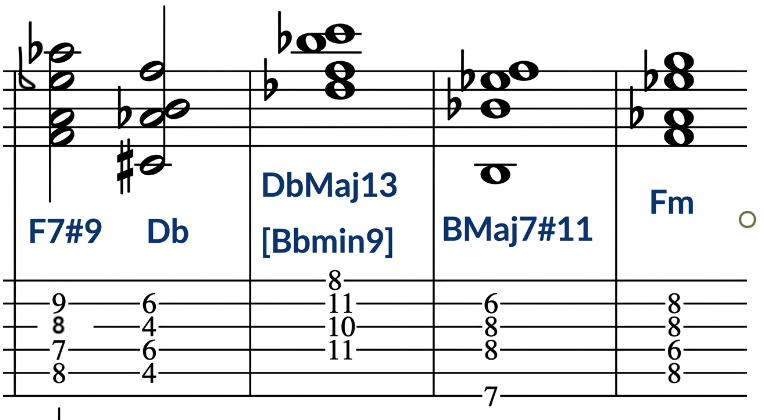
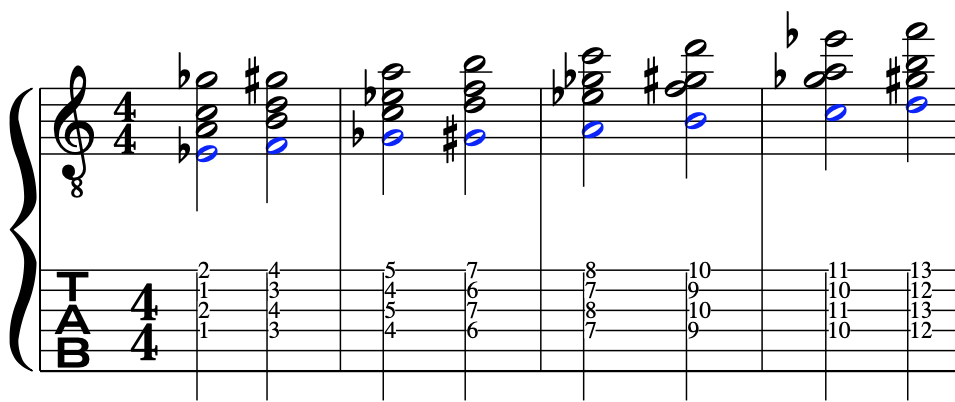
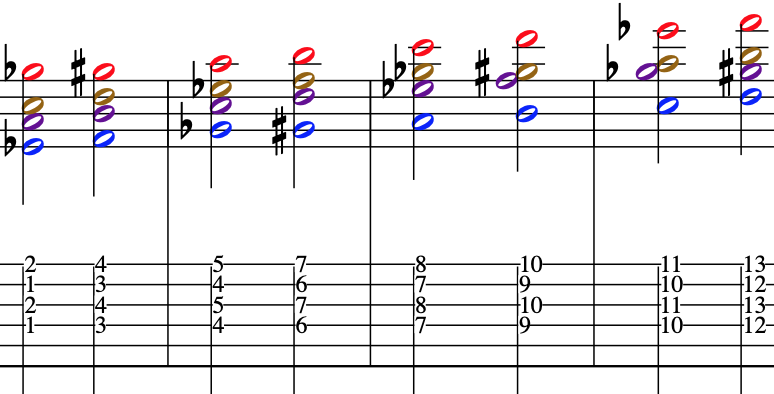
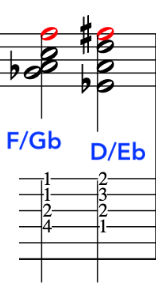
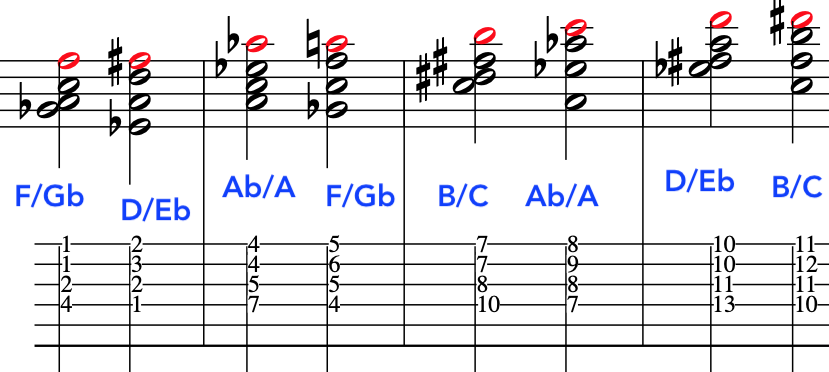
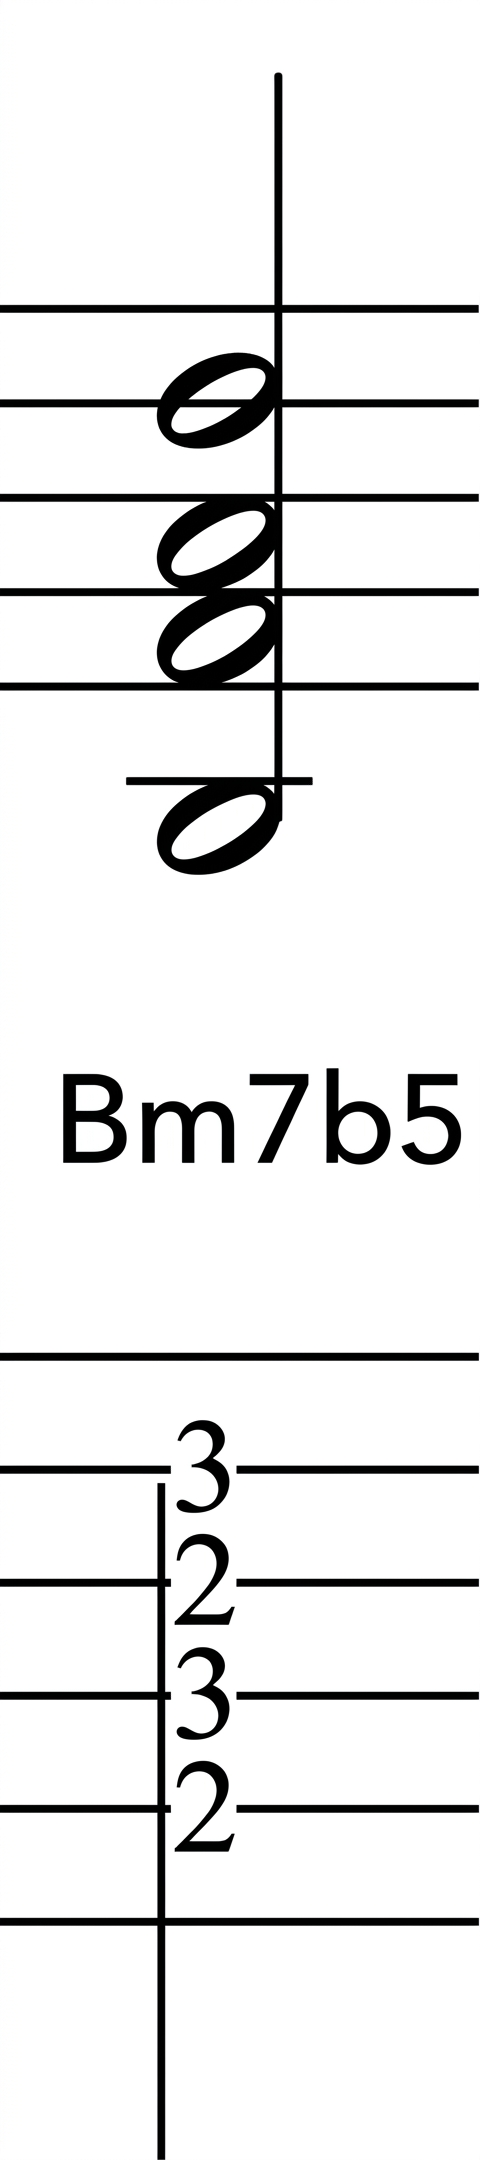
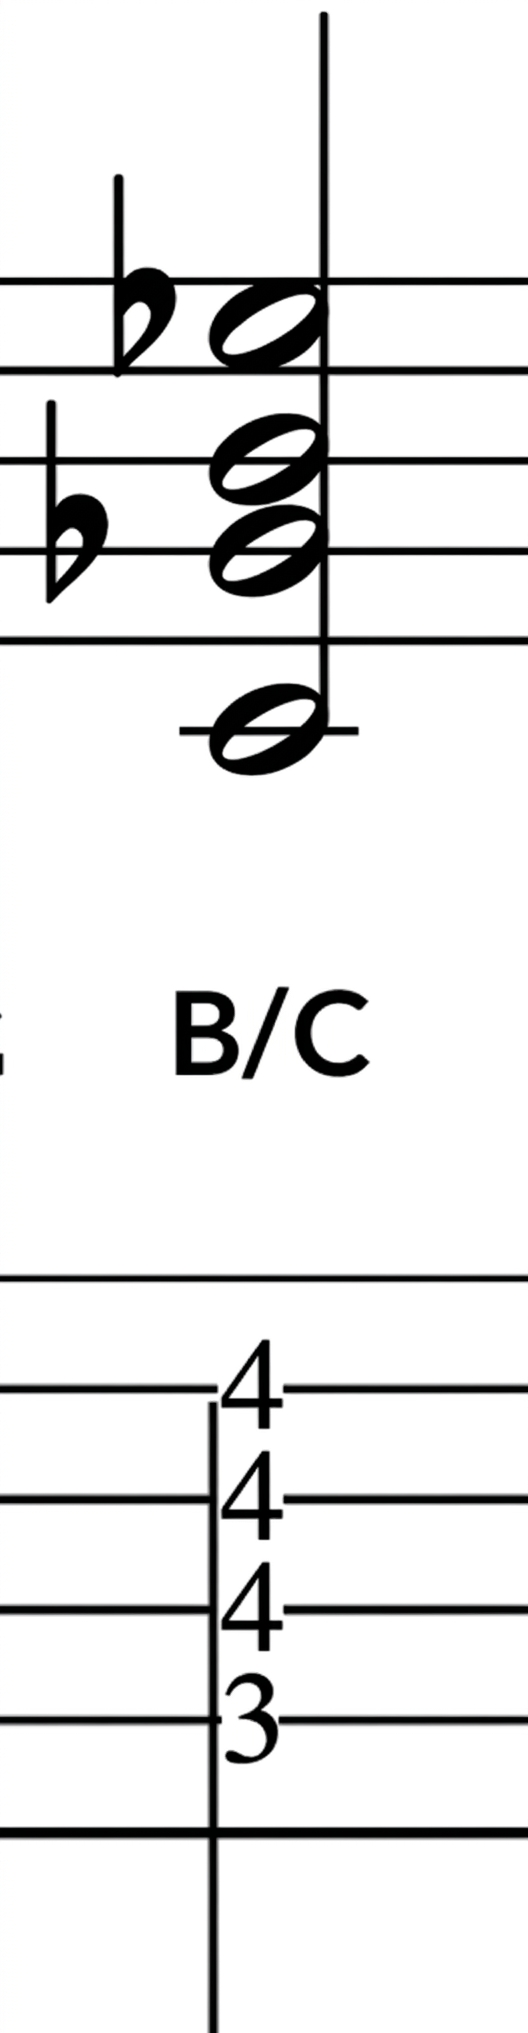
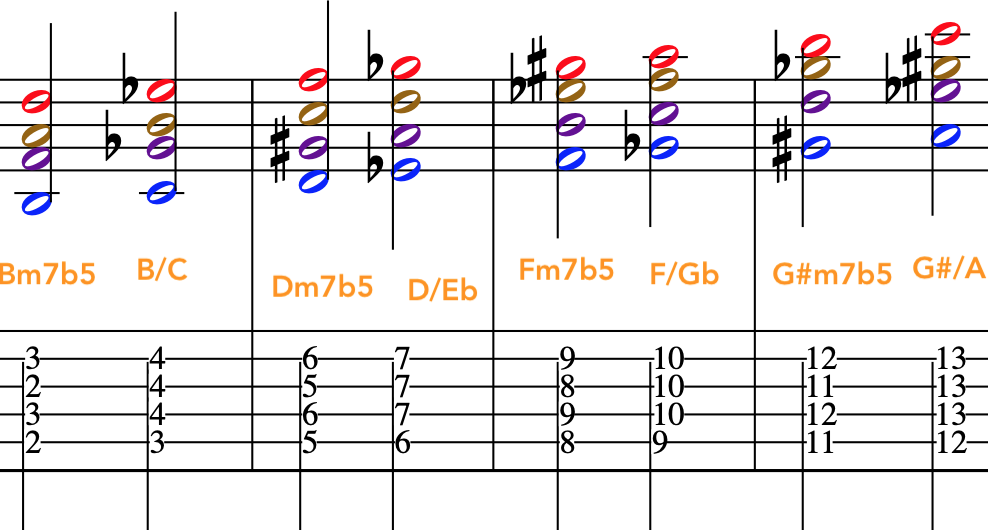
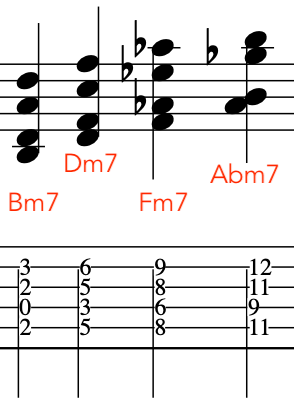
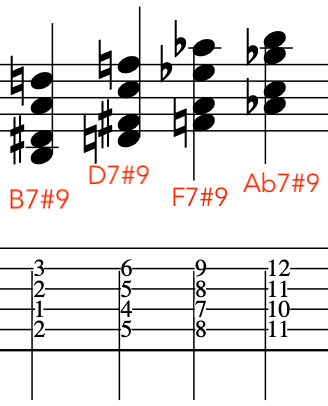
But, I will eventually add a video for these wonderful John McLaughlin “Open” chord voicing’s found in “Belo Herozonte” and the “Que Alegria” album.
So, without further ado, here they are.
[Some are quite common and others not so, but they all resonate and compliment each other beautifully on the acoustic guitar].
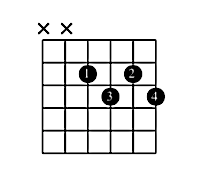
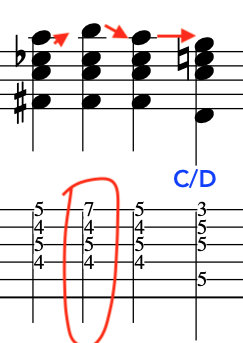
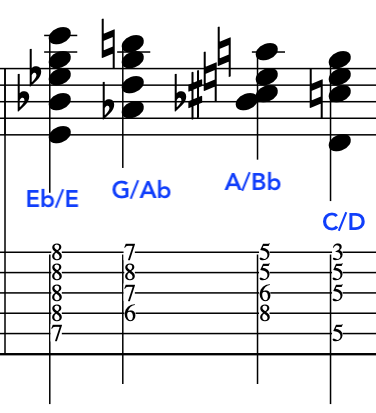
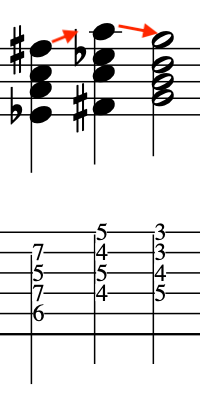
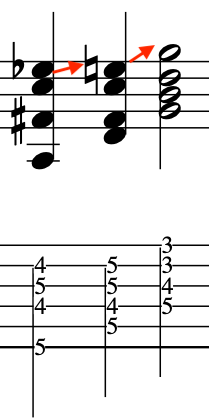
OPEN CHORDS:
John’s favourite chord shape [for acoustic]
Same shape from 4th fret
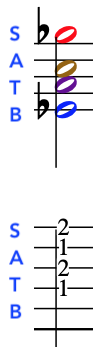
Simple 2 finger shape
Same/but move finger up a step [to/with 4th finger]
If there are two scales that I am always asked about, these are the whole tone scale and the diminished scale.
But, out of the two, it’s the whole tone scale especially!…And it’s due to the general textbook cumbersome and awkward fingering that puts guitarists off.
So, today let’s take a look at how to play the Whole Tone Scale with a simple fingering like that which we would employ for the pentatonic scale.
PART 1:
Standard textbook guitar fingering:
This, 3 note per string example above is a pretty uncomfortable and awkward affair that dosen’t flow and isn’t especially fluent for quick passages or phrases.
So what do we do?
Well, the answer is to approach it like we would the pentatonic scale, so that we can move the SHAPE about and at the same time we can VISUALISE it.
PART 2:
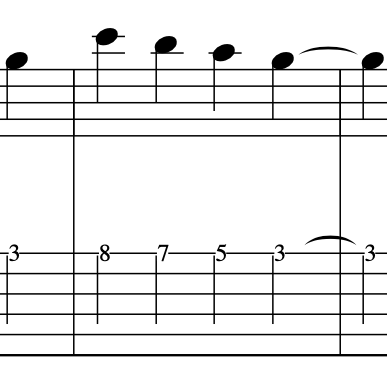
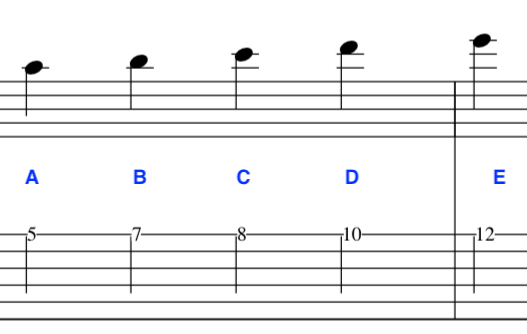
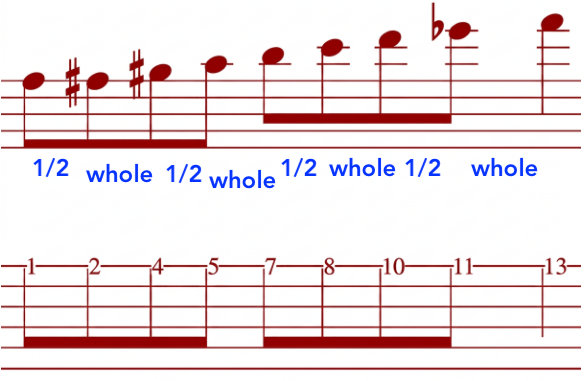
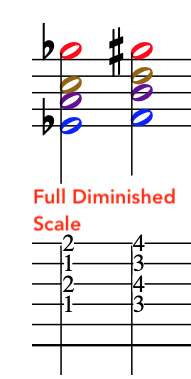
Here, is a preferred fingering that uses mainly 2 fingers:This, like the pentatonic means that we can move about quickly.
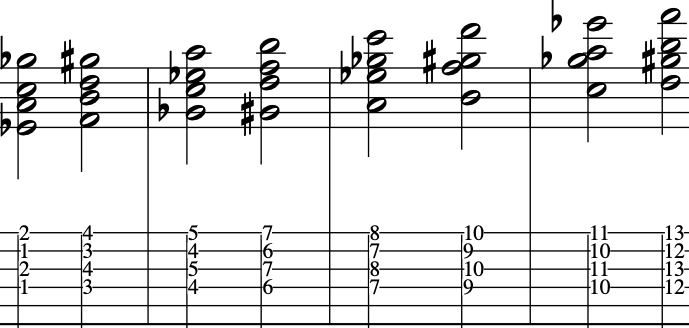
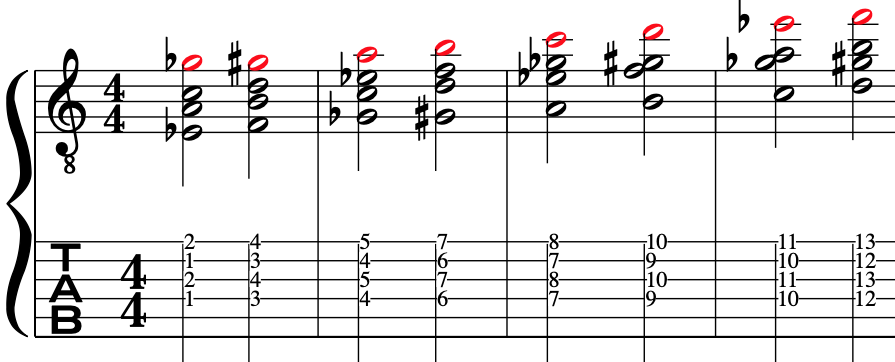
What’s truly great about this fingering is that we can copy and repeat it exactly “Down 1 Tone or Up 1 Tone” each time right along the guitar fingerboard.
BASIC SCALE SHAPE/FINGERING;
Copy Shape Exactly Ascending:
Copy Shape Exactly Descending:
Copy Shape Exactly Ascending:
This means that we can easily exploit the scale, play it fluently and see it visually which in turn gives us complete command of it.
PART 3:
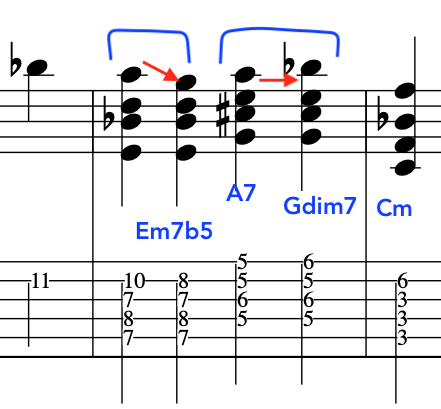
Now, that we can see and hear what we are doing and have a fluent fingering let’s make use of the scale harmonically.
To begin with, let’s use a flattened 5th interval [and Bb7] over a moving bass. [See video at the top of the page].
Now, let’s use this same harmony and create an [arpeggiated]chordal picking vamp:
Again, it’s easy to see and hear how we can quickly create composition now that we can visualise asimple shape all across the guitar fingerboard.
PART 4:
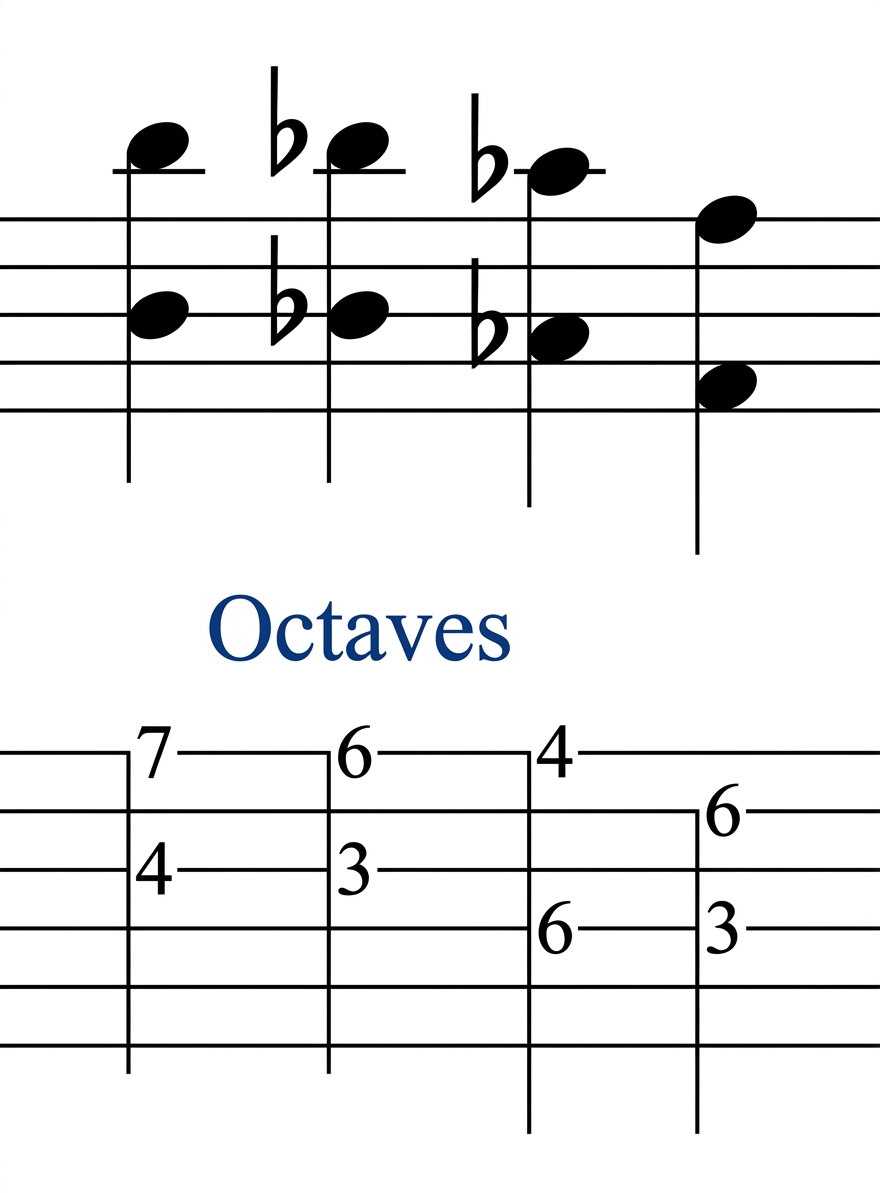
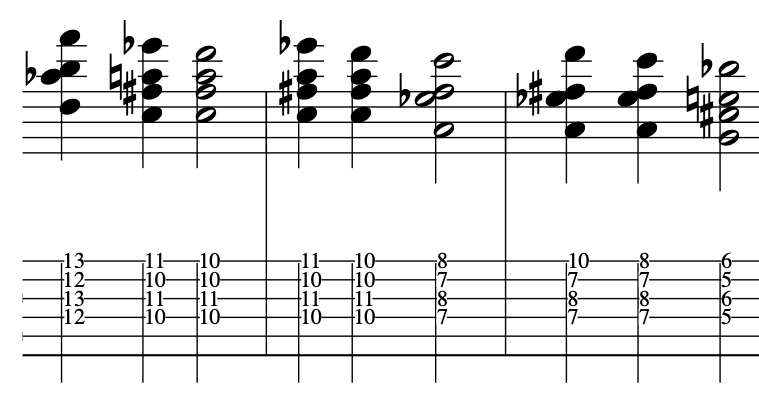
What, also works really well from this visual whole tone approach is the exploitation of the high low high [or mirroring] effect.
EXAMPLE 1: High to Low
Here, we will create a little phrase that’s going back and forth between the low and high registers.
EXAMPLE 2: Back and Forth
PART 5:
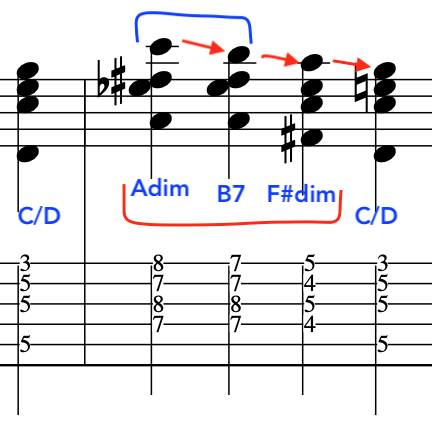
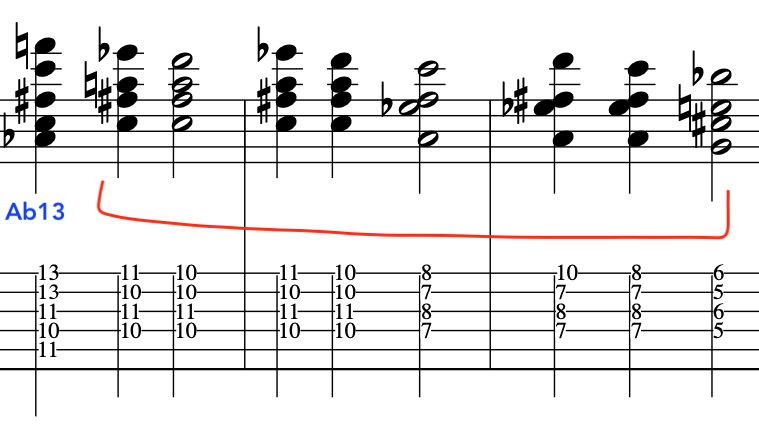
We will now apply this simple scale fingering to a classic Messiaen chord
Application and example:
PART 6:
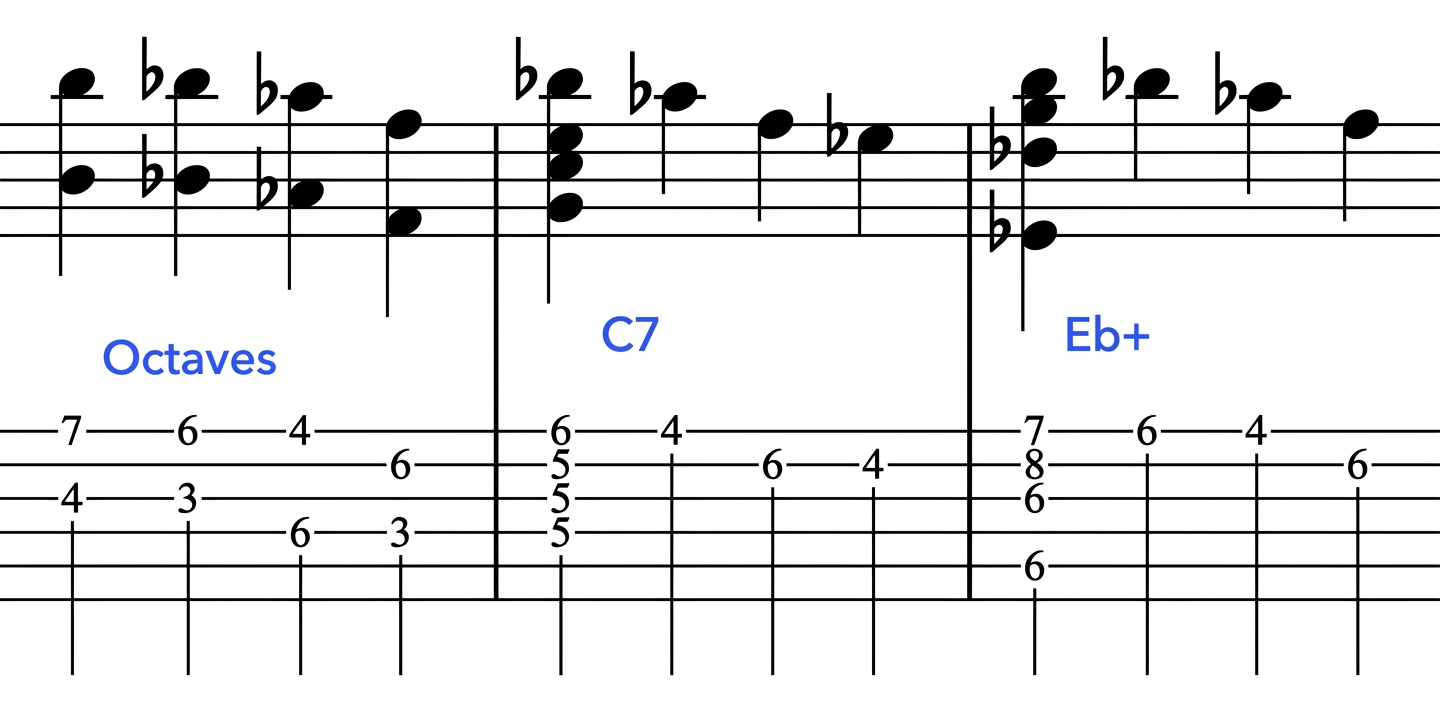
Finally, we can come out of the shape and move up and down the fingerboard connecting the whole tone [1 step] movements.
So, let’s take a chord of C augmented with a 9th:
As we can see, it’s easy to move down the fingerboard shifting through scale and arpeggio along the way. [See, video above]
IN CONCLUSION:
This was just a quick look at how essential it is to have simple fluid guitar fingering and simple 1 step connection for creating whole tone scale lines/phrases.
Having a “Visual” as well as harmonic understanding makes improvisation and composition so much easier with this scale.
And, as I have reiterated throughout this post, having a repeated shape only 1 tone apart makes the scale very user-friendly.